Next, you can use the QNX Momentics IDE to build an image file that can be loaded onto
the target board, and be debugged by the Macraigor Usb2Demon Debugger.
To build a system image:
- Download a BSP (Board Support Package) corresponding to your target hardware. You
can find BSPs for a wide variety of architectures from the QNX Foundry27 BSP
Directory at:
http://community.qnx.com/sf/wiki/do/viewPage/projects.bsp/wiki/BSPAndDrivers.
Ensure that you download a version of the BSP installer
appropriate for your host machine.
- Install the BSP downloaded in the previous step.
- Launch the QNX Momentics IDE and switch to the System Builder perspective.
- In the System Builder Projects view, right-click and select
Import.
- Select as an import source.
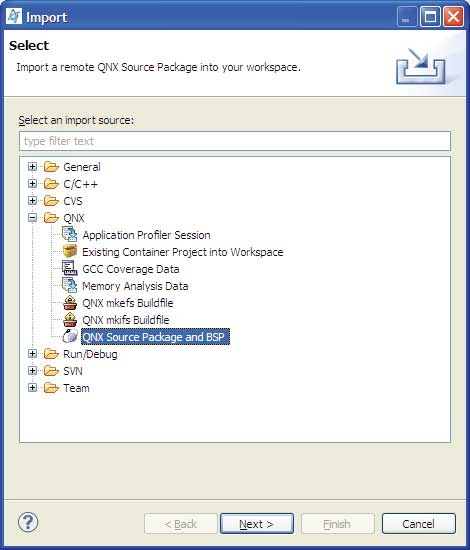
- Click Next.
- Select a BSP package to import, and click Finish. If you're
prompted with the message, Build the projects from the imported package?, click
Yes. Wait for the build to finish before proceeding. Note
that the import process may take several minutes, depending on the BSP you selected.
- Open the project.bld file from the System Builder Projects
view, and from the new view that appears, select the image that corresponds to your
board. In the Properties view on the right, ensure that the Create
startup sym file? property is set to Yes, and
that the Boot file type is set to elf.
Also, make note of the Image Address value, as you'll need it
later.
- Open the Project Explorer view.
- Right-click on the project whose name ends with _libstartup,
and select Properties.
- From the menu on the left, select QNX C/C++ Project, and then
click the Compiler tab.
- In the Code generation section, ensure that the
Optimization level is set to No
optimize, and add -g to the end of the Other
Options field.
Occasionally, you might have to specify a -O0 in
the Other Options field in order to overwrite the macros
defined, which could contain optimization. Click OK, and
when prompted to rebuild the C++ project, click Yes and
wait for the build to finish.
- Return to the System Builder Projects view and rebuild the image by right-clicking
on the project and selecting Build Project.
- In the Console view, you will observe some output. Scroll up to locate a line that
looks similar to this, for example:
400280 d188 403960 --- startup-bios.sym
Or:
200280 10188 202244 --- startup-mpc8349e-qs.sym
Note: The exact numerical values and filename will differ, but it will be the only
line ending with .sym. Take note of the first and third
numerical values on this line, as you'll need them later.
Now, in the System Builder Projects view, expand the Images
directory; it should contain an .elf file and a
.sym file. This is the Neutrino image that is ready to be
uploaded and debugged. However, before you can continue with the debugging process,
you'll need to create a launch configuration.